
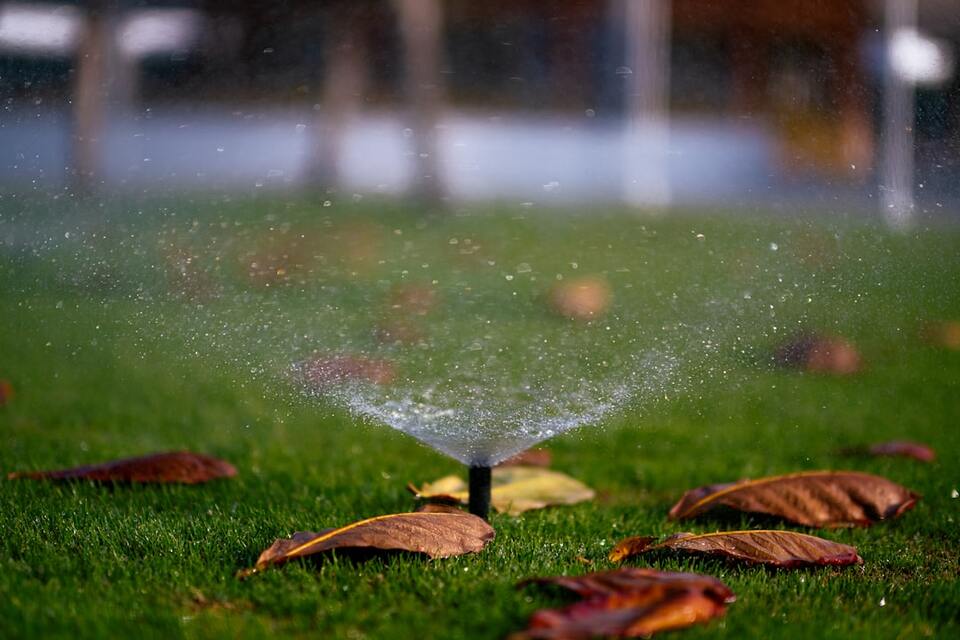
As the vibrant colors of Fall signal the end of the growing season, a hidden threat lies dormant within your yard's irrigation system. The residual water inside your sprinkler pipes, valves, and heads is a ticking time bomb, waiting for the first hard freeze. When that water expands into ice, it exerts immense pressure, leading to catastrophic breaks, costly leaks, and extensive landscape damage. This annual ritual of preparing for winter, known as a sprinkler blowout, is not just a suggestion, it's an essential task for protecting your investment.
Fortunately, you don't need to rely on expensive professional services. With the right tools and a clear plan, performing a DIY sprinkler blowout is a manageable and empowering weekend project. This guide will walk you through every step, demystifying the process of using compressed air to safely clear every drop of water from your sprinkler systems, ensuring they survive the freezing temperatures and are ready for spring.
Why Sprinkler Blowouts Are Non-Negotiable for Homeowners
Winterization is the single most important maintenance task for any irrigation system in a climate that experiences freezing weather. Skipping this step is a gamble against nature that rarely pays off, exposing you to significant financial and logistical headaches come springtime.
The Threat of Freezing Temperatures and Hard Freeze

When water freezes, it expands by approximately 9%, creating enough force to rupture pipes and destroy sprinkler components from the inside out.
The core principle behind a sprinkler blowout is basic physics. As water cools to 32°F (0°C) and freezes, it expands by approximately 9% in volume. This expansion creates incredible force within the enclosed pipes and components of your irrigation system. A single night of hard freeze is all it takes for this pressure to crack rigid PVC pipes, rupture flexible poly lines, and destroy sensitive internal mechanisms inside valves and sprinkler heads. The damage often occurs underground, remaining unseen until the system is turned back on in the spring, resulting in underground leaks that erode your landscape.
Preventing Costly Damages: Burst Pipes, Cracks, and Sprinkler Repair
The consequences of neglecting winterization are severe. Water damage and freezing are a major source of homeowner headaches, accounting for 22.6% of all home insurance claims between 2019 and 2023. The cost to fix a freeze-damaged system can be staggering, with the average U.S. household claim for such incidents exceeding $12,500. Even a minuscule one-eighth-inch crack in a pipe can leak up to 250 gallons of water in a single day, leading to foundation issues and a ruined lawn. A proper sprinkler blowout effectively eliminates this risk for a fraction of the potential repair cost.
Extending the Lifespan of Your Irrigation System
Think of winterization as crucial preventative medicine for your sprinkler system. By properly removing all water, you prevent the stress and micro-fractures that weaken components over time. This annual maintenance protects not only the pipes but also the more expensive elements like the backflow preventer, manifold, and electronic valves. A well-maintained system will last longer, perform more efficiently, and require fewer unexpected repairs, safeguarding the significant investment you've made in your home's landscape.
Sprinkler winterization fits into a broader fall checklist that includes aeration, overseeding, and one final fertilizer pass. Our fall lawn care guide covers the full sequence.
The Right Time: When to Winterize Your Sprinkler System
Timing is everything when it comes to a successful sprinkler blowout. Performing the task too early means you can't water your lawn during a warm, dry Fall, while waiting too long invites disaster. Pinpointing the perfect window requires a bit of planning and attention to your local climate.
Monitoring Local Forecasts: Before the First Hard Freeze/Frost
The golden rule is to winterize your irrigation system before the first hard freeze. A hard freeze is typically defined as a period when the air temperature drops to 28°F (-2°C) or lower for several hours. This is cold enough to freeze the ground and the water trapped in your pipes. Start monitoring your 10-day forecast as late autumn approaches. Once you see consistent nighttime temperatures dipping into the low 30s, it's time to schedule your blowout. Don't wait for the last possible moment.
Regional Considerations: Understanding Your Climate and Frost Level (e.g., Colorado, Denver)
Your geographic location dictates your blowout timeline. In colder northern climates like Colorado, homeowners in areas like Denver might winterize as early as late September or October. In more temperate transition zones, the season might extend into November. It's also crucial to understand that even states in warmer climates are not immune. For instance, Texas tops the list of frozen pipe damage costs because pipes are often uninsulated and homeowners are caught unprepared by sudden cold snaps. Know your region's typical first frost date and plan accordingly.
Recognizing the "Blow-Out Season"
The "blow-out season" is generally the period after you've finished watering your lawn for the year but before the ground freezes. This typically spans a few weeks in mid-to-late Fall. During this time, the soil is still workable, and you have a buffer before the first truly damaging freeze arrives. This is the ideal window to perform the winterization process.
Essential Tools & Equipment for a Successful DIY Blowout
While the process is straightforward, it requires specific equipment. Having the right tools on hand before you start is key to a smooth, safe, and effective sprinkler blowout.
The Heart of the Operation: Your Air Compressor
An air compressor is the most critical piece of equipment. However, not just any compressor will do. The key metric is not maximum pressure (PSI), but air volume, measured in Cubic Feet per Minute (CFM). You need a compressor that can deliver a sustained volume of air to push the water out of the entire length of a zone. For most residential systems, a compressor with a tank of at least 5-10 gallons and a rating of 4-6 CFM at 90 PSI is sufficient. Using a small pancake compressor designed for nail guns will likely be ineffective and frustrating.
Key Connections: Sprinkler Blowout Adapter, Fittings, and Hoses
You cannot connect an air compressor directly to your sprinkler system. You will need a specific sprinkler blowout adapter. This fitting typically has a quick-connect end for your compressor's hose and a threaded end that attaches to your system. Common connection points are an outdoor hose bib or a port on the backflow preventer. These adapters are often made of durable brass and come with standard Male National Pipe Thread (MNPT) or Female National Pipe Thread (FNPT) ends, designed to connect to a standard garden hose fitting.
Basic Hand Tools: Wrench, Screwdriver
You'll need a few basic hand tools. An adjustable wrench or channel-lock pliers will be useful for tightening fittings and making connections. A flathead screwdriver is often required to operate the small test cock valves on your backflow preventer.
Optional: RV Winterizing Kit (for specialized adapters, if applicable)
In some cases, an RV winterizing kit can be a source of useful adapters. These kits often include a short hose with a "blowout plug" that can be adapted for use on a sprinkler system's hose bib, providing another option for connecting your air compressor.
Pre-Blowout Prep: Getting Your System Ready
Before you even turn on the air compressor, a few preparatory steps are essential to ensure the process is safe and effective.
Shutting Off the Main Water Supply (Main shutoff valve, water supply)
The very first step is to locate and close the main shut-off valve for your irrigation system. This is typically located in your basement, crawl space, or an underground utility box near your water meter. This valve stops the water supply from your house to the sprinkler system. Turning the handle (usually a lever or wheel) fully clockwise will shut off the water flow. This is a non-negotiable step to prevent water from re-entering the system while you work.
Draining Residual Water (Manual drain valve, automatic drain valve, drain valves)
After shutting off the main water supply, you need to release the pressure and drain any remaining water from the interior pipes and the backflow preventer. Many systems have manual drain valves located near the main shutoff. Open these drain valves to let the water empty out. Some systems may also have automatic drain valves at low points in the piping, which should activate once pressure is released. This initial drain makes the compressed air blowout more efficient.
Step-by-Step: Your DIY Sprinkler Blowout Process
With the water off and your tools ready, you can begin the core task. Work methodically, zone by zone, to ensure every part of the system is cleared.
Connecting the Air Compressor to Your Irrigation System
Attach your sprinkler blowout adapter to the designated connection point. This is often a spigot located just after the backflow preventer or another access point on the mainline. Ensure the fittings are snug to prevent air leaks. Then, connect your air compressor's hose to the adapter's quick-connect fitting. Crucially, make sure all ball valves on the backflow preventer are closed at this stage.
Setting the Compressor Pressure (Pressure, Pressure regulating valve)
This is the most critical safety step. Too much pressure will damage your system. Set the pressure regulating valve on your air compressor to a low level. For systems with flexible polyethylene (poly) pipes, do not exceed 50 PSI. For systems with rigid PVC pipes, you can go up to 80 PSI, but it is always safer to start lower. Never "blast" the system with high pressure; let the volume of air (CFM) do the work.
Blowing Out Each Sprinkler Zone
Go to your sprinkler controller and manually activate the first zone. It's best to start with the zone furthest from the compressor. With the zone valve open, slowly open the ball valve on your blowout adapter to introduce compressed air into the system. You will hear air moving through the pipes, and soon the sprinkler heads in that zone will pop up and begin sputtering water. Let the air run until the heads are spraying only a fine mist, and then just air. This typically takes 2-3 minutes per zone.
Repeating the Process Until All Zones Are Clear: Persistence is Key
Once the first zone is clear, shut off the air from the compressor, then deactivate that zone at the controller. Move to the next zone and repeat the exact same process. Continue this cycle for every single zone in your irrigation system. It's good practice to run through all the zones a second time for a minute each to ensure any residual water is completely expelled. Do not run the compressor through a dry zone for too long, as the friction from high-velocity air can generate heat and damage plastic components.
Disconnecting and Securing Your System (ball valves, shut-off valve, system shutdown)
After all zones are clear, turn off and disconnect the air compressor. Leave the sprinkler controller in the "off" or "rain" mode for the winter. To prevent any trapped pressure, it's recommended to leave the ball valves on the backflow preventer and any manual drain valves open at a 45-degree angle (halfway). This completes the system shutdown.
Crucial Step: Winterizing Your Backflow Preventer
The backflow preventer is an expensive and sensitive device that requires special attention. Simply blowing air through it is not enough to protect it from freeze damage.
Understanding Your Backflow Device (backflow preventer, backflow device, backflow assembly, test cocks)
A backflow preventer is a safety device required by plumbing codes to protect your home's potable water supply from contamination by irrigation water. This backflow assembly has internal valves, springs, and small ports called test cocks that can trap water.
Detailed Guide to Draining a Pressure Vacuum Breaker (PVB)
The most common residential backflow device is a Pressure Vacuum Breaker (PVB). To winterize it, first ensure the two shut-off ball valves on the device are closed. Using a flathead screwdriver, slowly turn the screws on the two small test cocks a quarter-turn to open them. Water will drain out. Leave these open for the winter. This simple step ensures no water is trapped inside the main body of the PVB, preventing it from cracking.
Instructions for Draining Other Backflow Types (e.g., Reduced Pressure Zone (RPZ) devices)
Some systems use a more complex Reduced Pressure Zone (RPZ) device. These have more test cocks and a bottom-facing drain valve. The process is similar: close the shut-off valves and open all drain ports and test cocks to ensure every chamber is empty. If you are unsure about your device type, consult its manual or look up the model number online for specific winterization instructions.
Troubleshooting & Common Mistakes to Avoid
A DIY blowout can sometimes present challenges. Being aware of common pitfalls can help you avoid them and troubleshoot effectively.
Insufficient Air Pressure or Compressor Size for Your System
If you find that water is barely sputtering from the sprinkler heads or not clearing at all, your air compressor likely has an insufficient CFM rating for your system's needs. The volume of air is too low to push the entire column of water out of the pipes. In this case, you may need to rent a larger, tow-behind compressor to do the job properly.
Forgetting to Open All Valves or Blow Out All Zones
A dangerous mistake is to introduce compressed air into the system without giving it a path to escape. Always ensure a zone valve is open before you open the valve from the compressor. Forgetting a zone entirely leaves it vulnerable to freezing. Use a checklist to mark off each zone as you complete it to ensure none are missed. Finally, double-check that your sprinkler controller remains off for the winter to prevent it from attempting to open valves and run the system.
Conclusion
Winterizing your sprinkler system through a DIY blowout is more than just a chore; it's a vital act of home maintenance that saves you money, prevents catastrophic damage, and extends the life of your irrigation system. By understanding the threat posed by freezing temperatures and following a clear, methodical process, you can confidently protect your investment.
To recap the essential steps: shut off the main water supply, connect an appropriately sized air compressor with the correct fittings, set the pressure to a safe, low level (under 80 PSI), and blow out each zone individually until only air emerges. Pay special attention to winterizing your backflow preventer by opening its test cocks. By avoiding common mistakes like using excessive pressure or forgetting a zone, you can ensure a successful system shutdown. Armed with this knowledge, you are fully equipped to tackle your sprinkler blowout, ensuring peace of mind through the winter and a healthy, functional system ready to perform next spring.
[widget=Blog Sprinkler Blowout Made Easy]